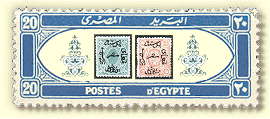
Type.1 Design upright.
(a) Cross bar from lower right triangle.
(b) Right upper lozenge is open at outer end and the circle above it shows a wide breach.
(c) Wide breaches in lower outer frame line beneath first, second, and seventh hooks.
Type 2. Design upright.
(a) Cross bars from both lower triangles.
(b) Small coloured projection from right upper triangle level with third horizontal line from top.
(c) Similar projection from inner surface of left upper tablet contain "10 " level with top line of triangle.
Type 3. Design upright.
(a) Cross bars from both lower triangles.
(b) Breaks in the base line of both lower lozenges.
(c) Sharp break in lower outer frame line beneath upright of fourth hook, the end on the left is turned upwards.
Type 4. Design inverted.
(a) Coloured fragment adherent to upper outer frame line above sixth diamond.
(b) Minute coloured fragment adherent to lower outer frame line below curve of " 5 " and break in line to left of this with single fragment in its centre.
(c) fragmented upper outer frame line from near left corner to right point of first diamond.
(d) Ditto in lower outer frame line from mid point of left lower tablet to right point of first diamond.
Type 5 Design upright.
(a) Cross bar from lower right triangle.
(b) Fragments of cross bar joining third line of right upper triangle to tablet containing "PARA" and similar coloured projection from the same tablet level with the second line of the triangle.


